Something is mesmerizing about watching a kite soar through the sky. But what factors affect how a kite flies?
The way a kite flies is affected by various factors, including the length of the kite tail, the material the kite is made from, the size and weight of the kite, and the kite’s shape.
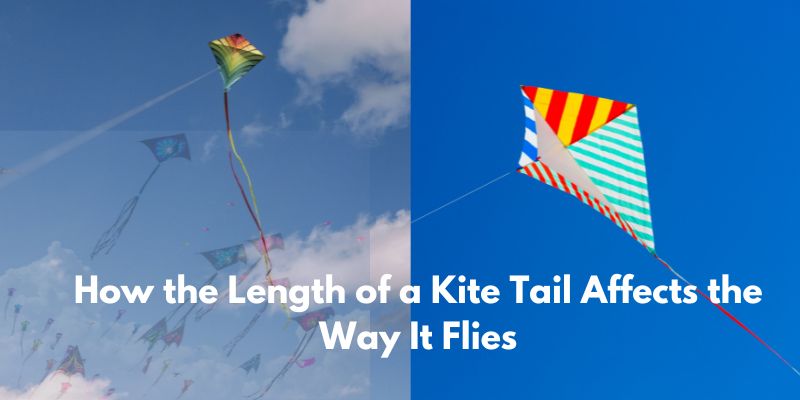
How does the length of a kite tail affect the way it flies? This blog post will explore that question in depth!
The Kite 101
A kite is a tethered aircraft. The lifting force that sustains the kite in flight is generated when air flows over and under the kite’s surface, producing low pressure above and high pressure below the wings.
Parts of a Kite
Several different parts are needed to fly a kite. These parts include the bridle, the wing, and the tail. Each region has a specific purpose; without one, the kite would not be able to fly.
The bridle attaches the kite to the flying line and balances it, so it flies in a particular way. The wing provides lift, keeps the kite stable, and drives it forward through the air.
The tail is necessary for balance and stability in flight; it keeps the kite flying straight and prevents it from spinning around.
Kite Tail Design
Kite tails come in many different shapes and sizes, each serving another purpose.
Flat Tails
Flat tails are usually made of light materials such as paper or fabric. They are designed to add stability to the kite and keep it flying in high winds.
Tubes Tails
Tubes are made of heavier materials such as plastic or metal. They are typically used on more giant kites where flat tails would not provide enough support.
Line Art
Line art kites often have multiple tails of different colors and patterns. These tails help to create the illusion of movement and make the kite more visually appealing.
Bouncers
Bouncers are another type of kite tail specifically designed to create a bouncing motion. This can be achieved using various materials, including rubber, leather, or yarn.
Related Article: Can You Fly a Kite Without Wind?
Why Does a Kite Need a Tail?
A kite needs a tail to fly straight and not spin. The wind hits the kite and goes under the kite and up into the sky. The wind pressure on the kite makes it want to go up into the air.
The kite would fly away if it were not for the tail. The tail keeps the kite from spinning around. The wind also hits the tail and goes around the tail and back down under the kite.
Kites with tails fly straighter. If there were no tail, there would be nothing to keep the kite from spinning around and around. The tail is important because it makes the kite fly better.
How Does the Length of a Kite Tail Affect the Way It Flies
The length of a kite tail affects the way it flies in two major ways: stability and maneuverability.
Stability
The length of a kite’s tail is one factor that affects the stability of the kite. A longer tail provides more stability than a shorter one because it increases the drag on the kite and slows down the rate at which it can turn.
The larger the surface area of the tail, the greater the drag. A longer tail also makes it easier for a kite to recover from a gust of wind or a turn.
However, there are some drawbacks to having a long tail. A long tail can make it challenging to launch a kite and increase the chance of tangling.
Maneuverability
The length of a kite tail can profoundly affect its maneuverability. A longer tail will provide more stability, making it easier to keep the kite steady in windy conditions.
However, a shorter tail will allow the kite to respond more quickly to changes in wind direction, making it more agile.
In general, shorter tails are better suited for tricks and complex maneuvers, while longer tails are better for beginners or flying in windy conditions.
Experienced kite flyers often use various tail lengths, depending on the type of flying they intend to do.
The length of the tail can also affect the kite in the following ways:
- The length of a kite tail affects the amount of lift generated by the kite. Kites with long tails have more lift, making the kite easier to fly in windy conditions. A shorter tail will lift less, making the kite more challenging to fly in windy conditions.
- The length of a kite’s tail affects the kite’s center of gravity. A longer tail will move the center of gravity rearward, making the kite more stable in flight. A shorter tail will move the center of gravity forward, making the kite less durable in flight.
- The length of a kite tail affects the turning radius of the kite. A longer tail will make the kite turn more slowly, while a shorter tail will make the kite turn more quickly.
- The length of a kite’s tail affects the visibility of the kite in flight. A longer tail will make the kite more visible to other pilots, while a shorter tail will make it less visible.
How Long Should a Kite Tail Be
How long should a kite’s tail be? It depends on the kite. Larger kites generally need longer tails to stay stable, while smaller kites can get by with shorter tails.
In general, though, most kites perform best with tails around three to eight times the kite’s length. This gives the kite enough stability to fly in a wide range of conditions without making it so unstable that it is difficult to control.
[Note: Red mark doesn’t match with this issue and not necessary to mention]
Of course, this rule is always an exception, and some kites fly better with shorter or longer tails. Ultimately, it is up to the kite flyer to experiment with different tail lengths to find what works best for their kite.
Read More: How to Fly a Kite in Low Wind?
How to Make a Simple Kite Tail
A kite tail is a simple way to add stability and color to your kite. You can make a kite tail using items you probably have around the house, such as ribbons, streamers, or even plastic bags.
The best kite tail material to use is something lightweight that will flap in the wind.
To make a kite tail, start by measuring out the length of ribbon or streamers you will need. It’s important to leave enough slack so the kite tail can move freely in the wind.
Next, tie the ribbon or streamers to the bottom of the kite’s frame. If you’re using plastic bags, fill them with air and tie them securely to the kite.
You can experiment with lengths, widths, and materials to see what works best for your kite. Just remember that a kite tail should be lightweight and able to move freely in the wind.
With a little trial and error, you’ll be flying high in no time!
Does a Box Kite Need a Tail?
A box kite is a high-flying kite that gets its lift from a series of boxes, or cells, open at the front and attached. Unlike traditional kites with a single frame, box kites have multiple frames that give them a boxy shape.
Box kites were initially developed in the late 19th century, and they were large and complex devices that required a team of people to fly.
In recent years, however, box kites have become much simpler and more portable, making them a popular choice for kite enthusiasts. One question that often comes up about box kites is whether or not they need tails.
The answer depends on the type of box kite you’re using. Some box kites, such as the diamond-shaped Rokkaku, are stable enough to fly without a tail.
However, most box kites will benefit from having a tail, which helps to keep the kite balanced and prevents it from spinning out of control.
So, if you’re wondering whether your box kite needs a tail, the answer is probably yes.
Kite Flying Tips
1. You’ll need a kite, of course. And it helps to have a helper, especially when first learning. Choose a day when the wind blows between 10 and 20 miles an hour. If it’s too windy, your kite will be challenging to control. If it’s not windy enough, your kite won’t fly.
2. Before launching your kite, ensure no power lines or trees are in the way. You don’t want your kite to get tangled in something and ruin your fun.
3. To launch your kite, have your helper hold the kite up while you run downwind with the kite line in hand. When the kite is over your head and the line is taunted, let go of the kite and let it fly!
4. To keep your kite flying high, you’ll need to keep tension on the line at all times. Let out line when the kite starts to descend and pull in line when the kite starts to rise. You may need to experiment to find just the right amount of tension.
5. Turns are made by briefly easing up on one line while pulling on the other. For a left turn, ease up on the left line while pulling on the right line. For a right turn, do the opposite.
6. Pull sharply on both lines if you want to make your kite dive or climb steeply. This is called an “S” turn because of the shape that it traced in the sky.
7. To make your kite loop-the-loop, pull sharply on one line and then quickly release it while maintaining tension on the other line. Then will rotate around its center point and trace a loop in the sky!
8. As you become more experienced, you can try flying two or more kites simultaneously! Line tangles are less likely if each kite has its separate line but be prepared for some exciting maneuvers as they cross paths in midair!
9. To land your kit, simply bring It down into the wind, gradually decreasing tension on the lines as It nears the ground. Have your helper hold onto the kite until you can grab it, then wind up the line and call it a day!
10. Most importantly, have fun! Kite flying is a great way to enjoy the outdoors and get some exercise. So go out and give it a try!
With these tips in mind, you’re ready to enjoy hours of fun flying your kite! Remember to stay safe and respect other people’s property when flying.
Conclusion
Kite tails are a vital part of flying a kite. They help to stabilize the kite and keep it flying in the right direction. If you’re just getting started, we recommend using a tail.
Once you’ve mastered the basics, you can experiment with flying without a tail to see what happens! Just be prepared for a bit more of a challenge.
Happy kiting!